Publications
What is a publication?
A Publication in Rana is a collaborative space where you can share your project data and visualisations with stakeholders. It allows you to bundle specific files from your project — such as simulation results, maps, and datasets — and present them in an interactive viewer.
The Publication Viewer makes it easy to communicate results, gather feedback, and align with stakeholders. You can pin chat comments directly to locations on the map, enabling contextual discussions and clarifications. This visual communication method reduces confusion and speeds up decision-making.
Use publications to:
Share project updates with clients or colleagues
Present specific scenarios or designs
Collect feedback in a structured and visual way
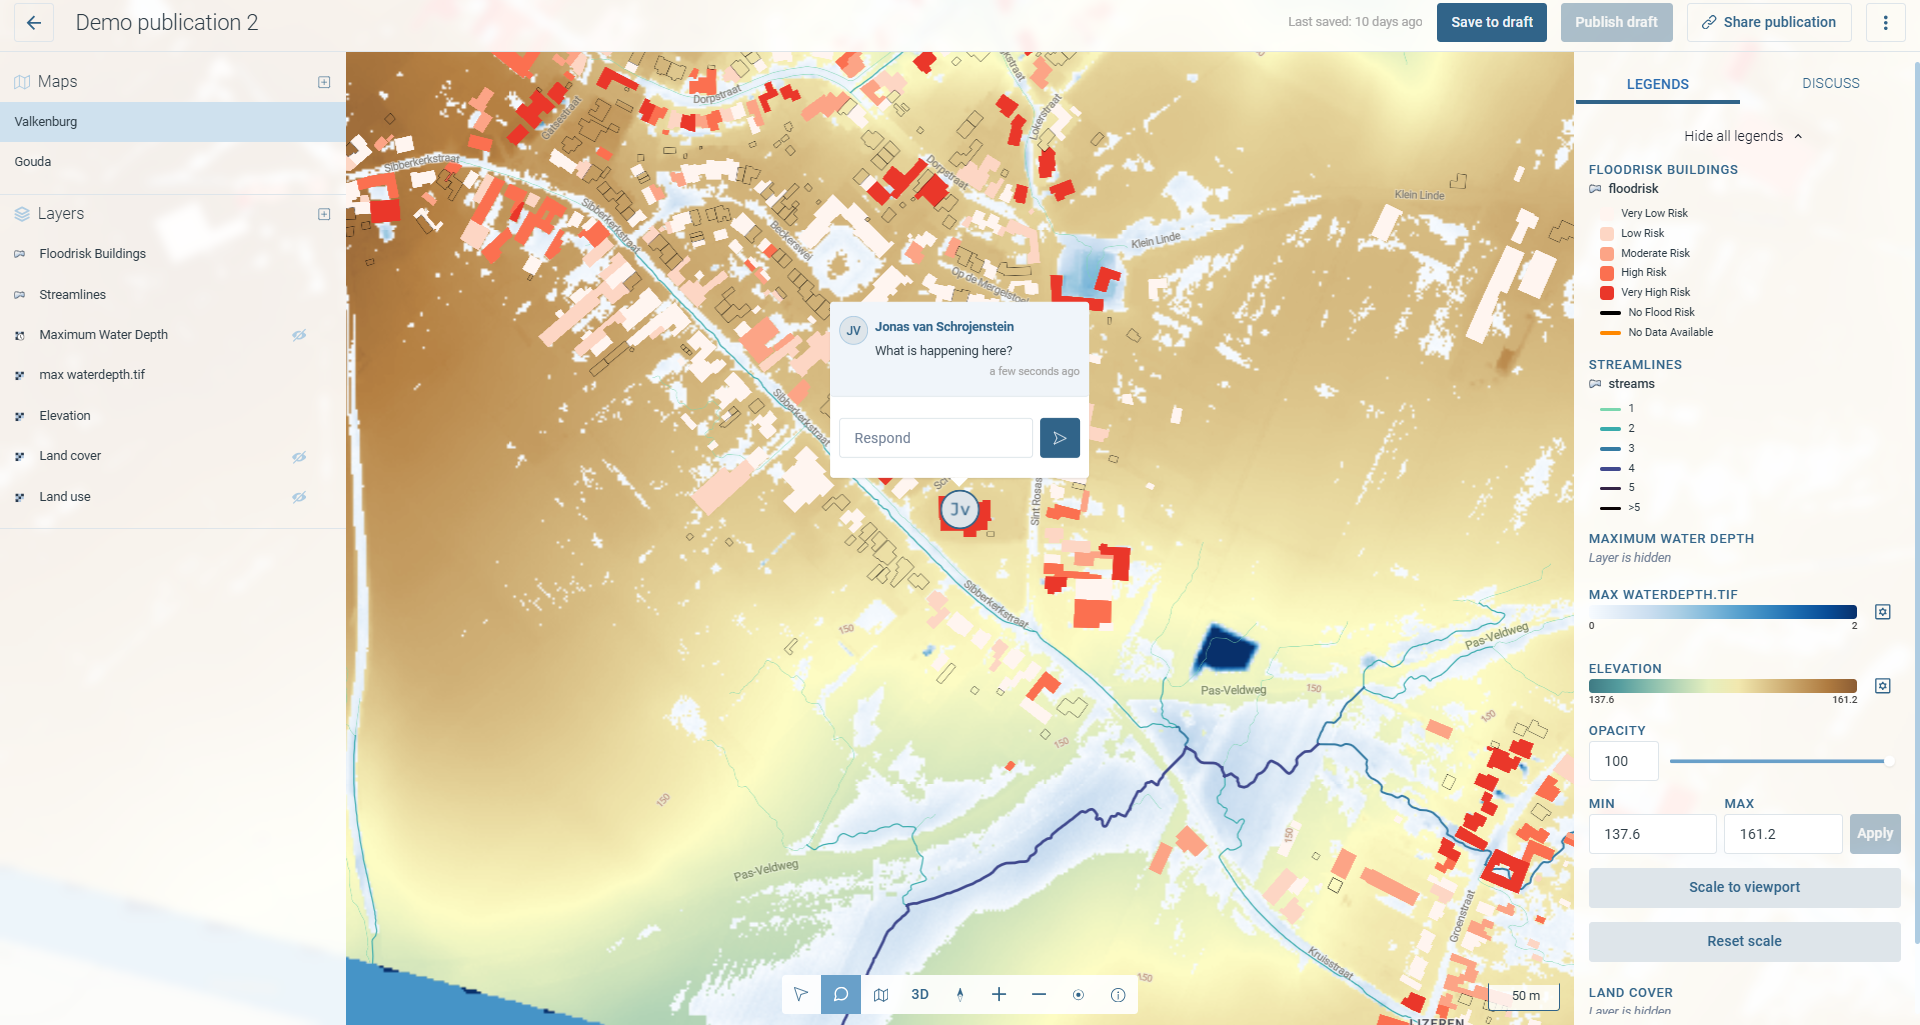
Fig. 7 An example publication showing a flood depth map with a comment pinned to a location on the map
Publications overview
You can access all publications for a project via the Publications tab in the project navigation bar.
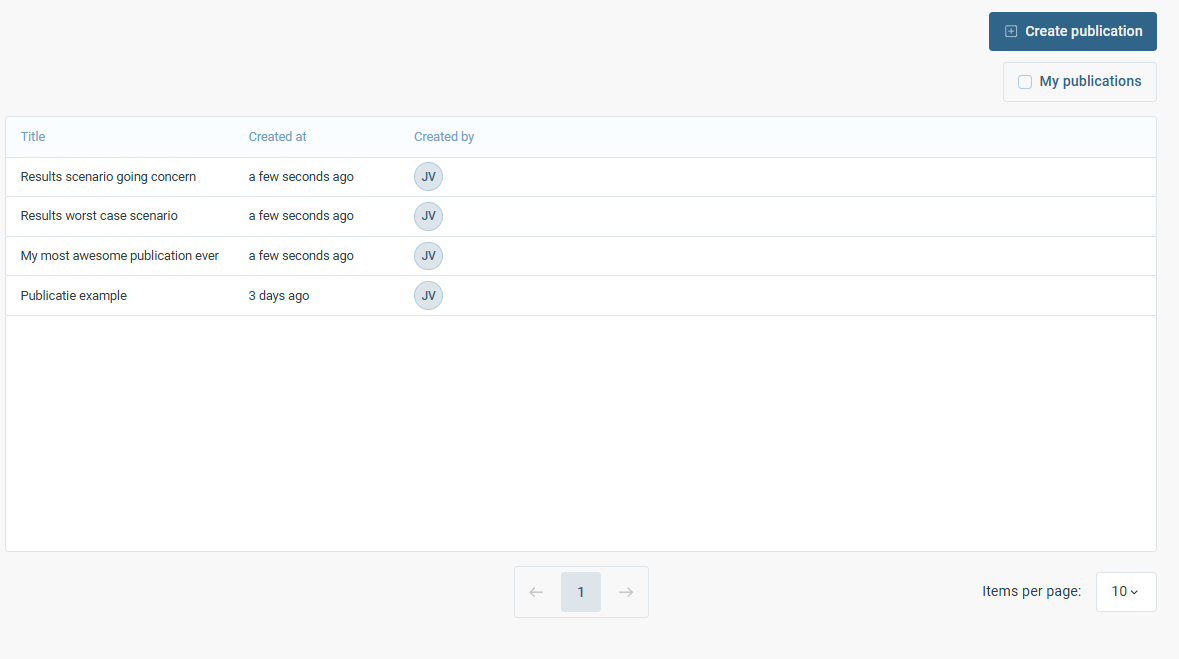
Fig. 8 The Publications tab shows all publications in a project, with their title, creation date and the user who created them.
The overview lists all publications in the project, sorted by creation date (most recent first). Each row shows:
Title — the name of the publication
Created at — when the publication was created (absolute date or relative time)
Created by — the avatar of the user who created the publication
Use the My publications checkbox in the top-right to filter the list to publications you created yourself. The list is paginated; use the page controls at the bottom to navigate between pages, and the Items per page selector to control how many items are shown at once.
Creating a publication
To create a new publication, click the + Create publication button in the top-right of the Publications overview. Give the publication a descriptive title. After creation, the publication opens in the publication detail view.
Adding files to a publication
After creating a publication (or when editing an existing one), you land on the publication detail page. This page shows the files that have been added to the publication.
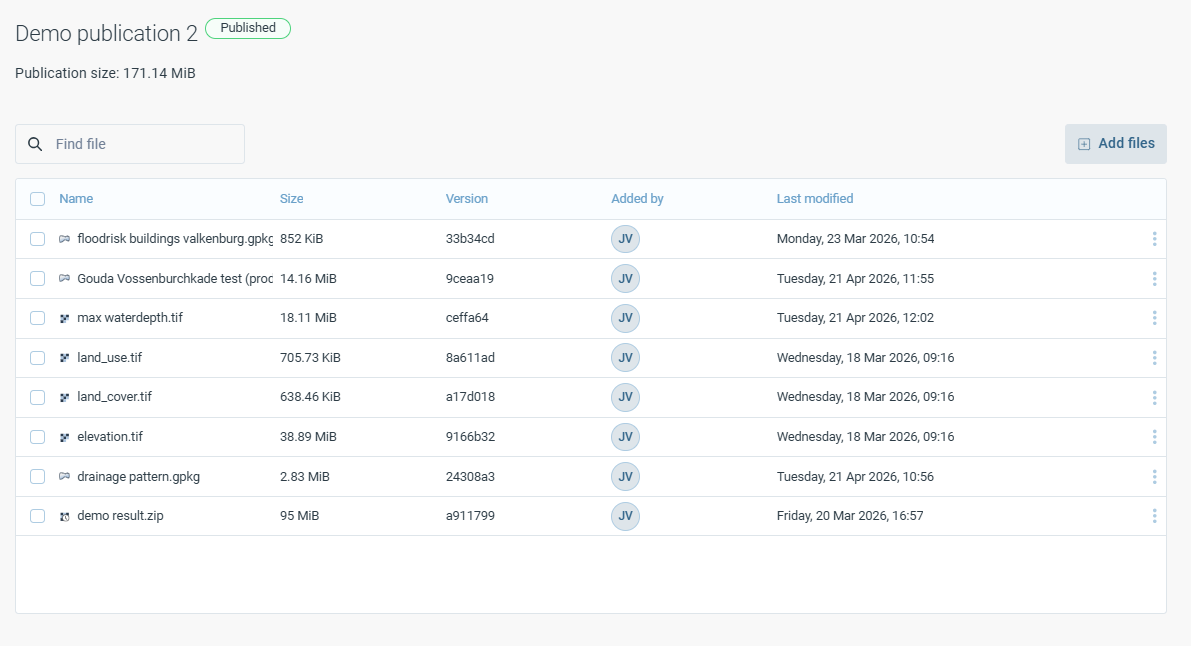
Fig. 9 The publication detail page. One result file has been added. The publication is currently in Draft status.
From this page you can:
Add files — click + Add files to select files from your project’s file storage and add a specific version of each file to the publication. Only project-specific files can be added, ensuring all data remains traceable and documented.
Find a file — use the search bar to filter the file list by name.
See file details — the table shows the file name, size, version hash, who added it, and when it was last modified.
Remove files — use the three-dot context menu on a file row to remove a file from the publication.
The Publication size indicator at the top of the page shows the total size of all files included in the publication.
Note
When you add a file to a publication, a specific version of that file is captured at that moment. If the file is updated in the project later, the publication will not automatically reflect those changes. This ensures that all stakeholders are always looking at the same, consistent snapshot of the data. See Versioning in publications below for more detail.
Publishing a publication
A new publication starts with Draft mode. A draft is not yet visible to other stakeholders.
Note
It is strongly advised not to work on a publication in draft mode at the same time as your colleague. Although it is possible to have the same publication open in draft mode by multiple users changes will only be saved for the last person saving the draft.
When you are ready to share the publication, click Publish draft (available both on the detail page and in the publication viewer). The status changes to Published.
If you like to make further changes to a published publication (for example, by adding new files) click the button Edit Publication, you switch now to draft status again where you can make your changes. After you are done and would like to share the updated version, click Save to draft and after that Publish draft.
The Last saved timestamp next to the publish button indicates when changes were last auto-saved.
Opening the Publication Viewer
Click Open viewer on the publication detail page to open the interactive publication viewer in a new view.
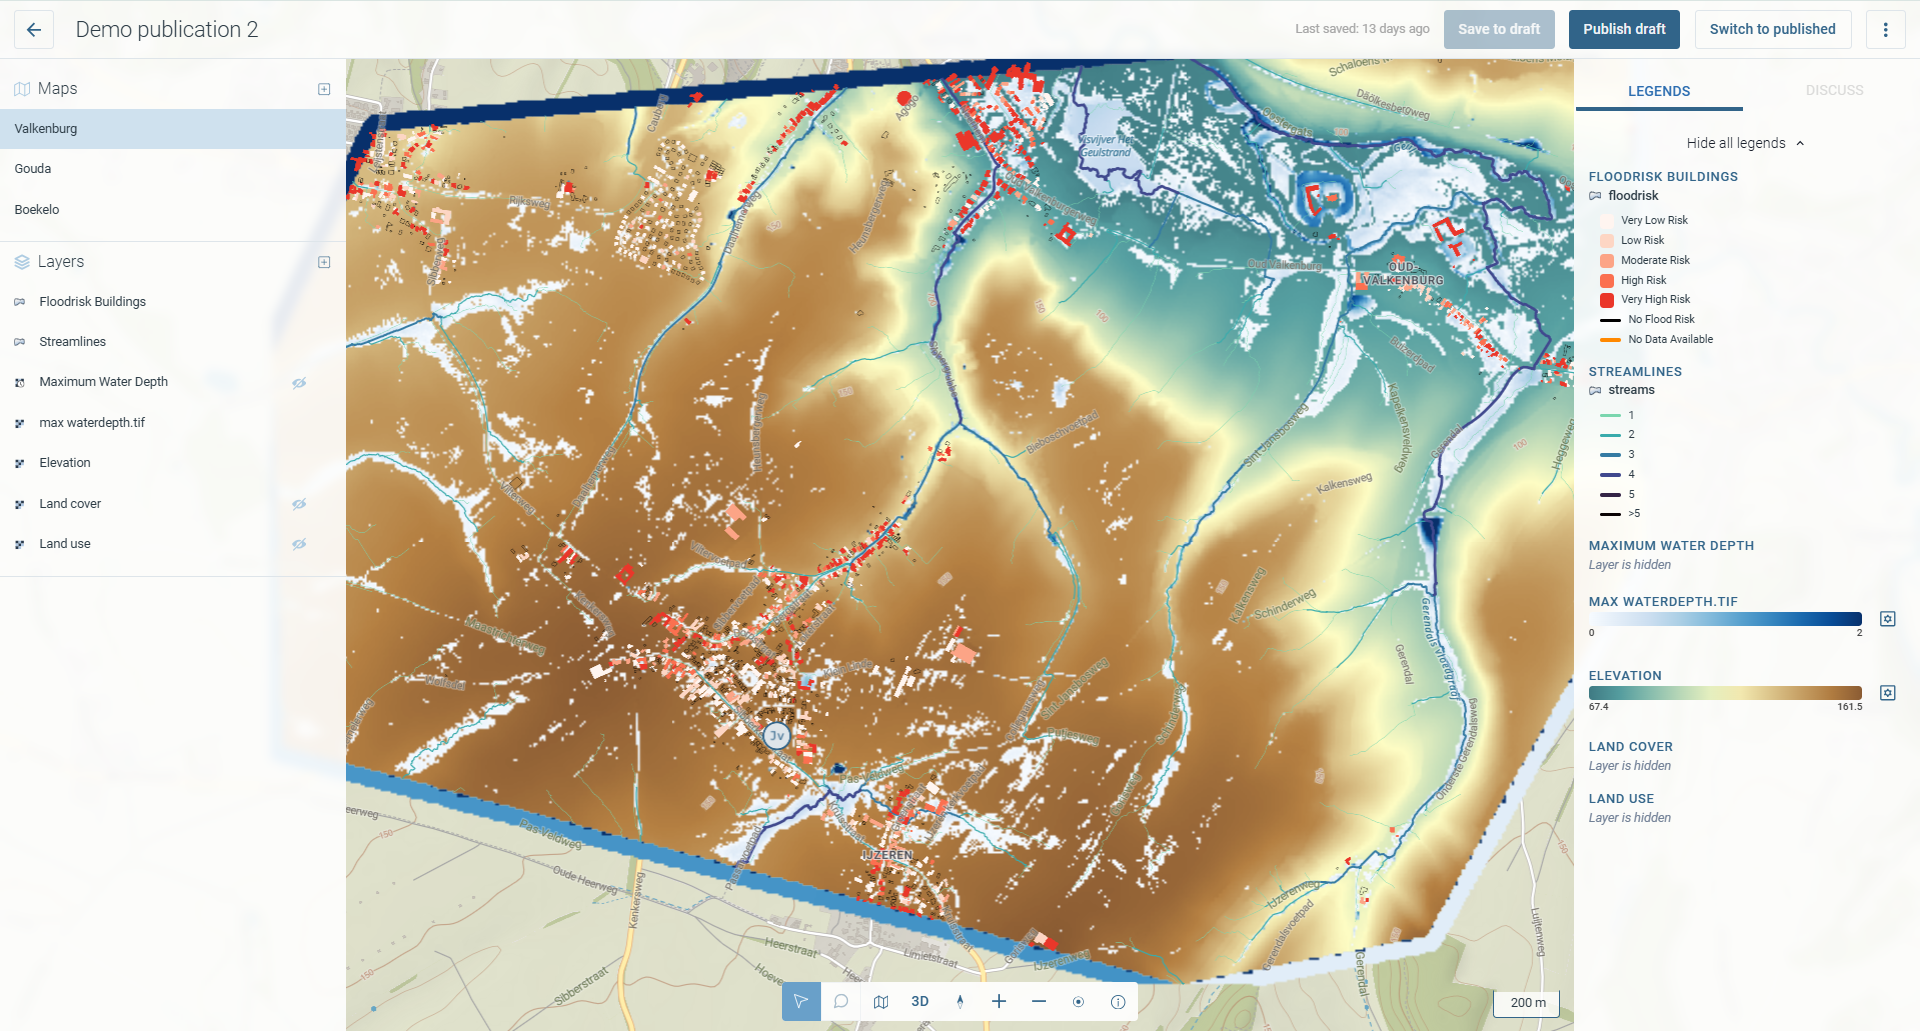
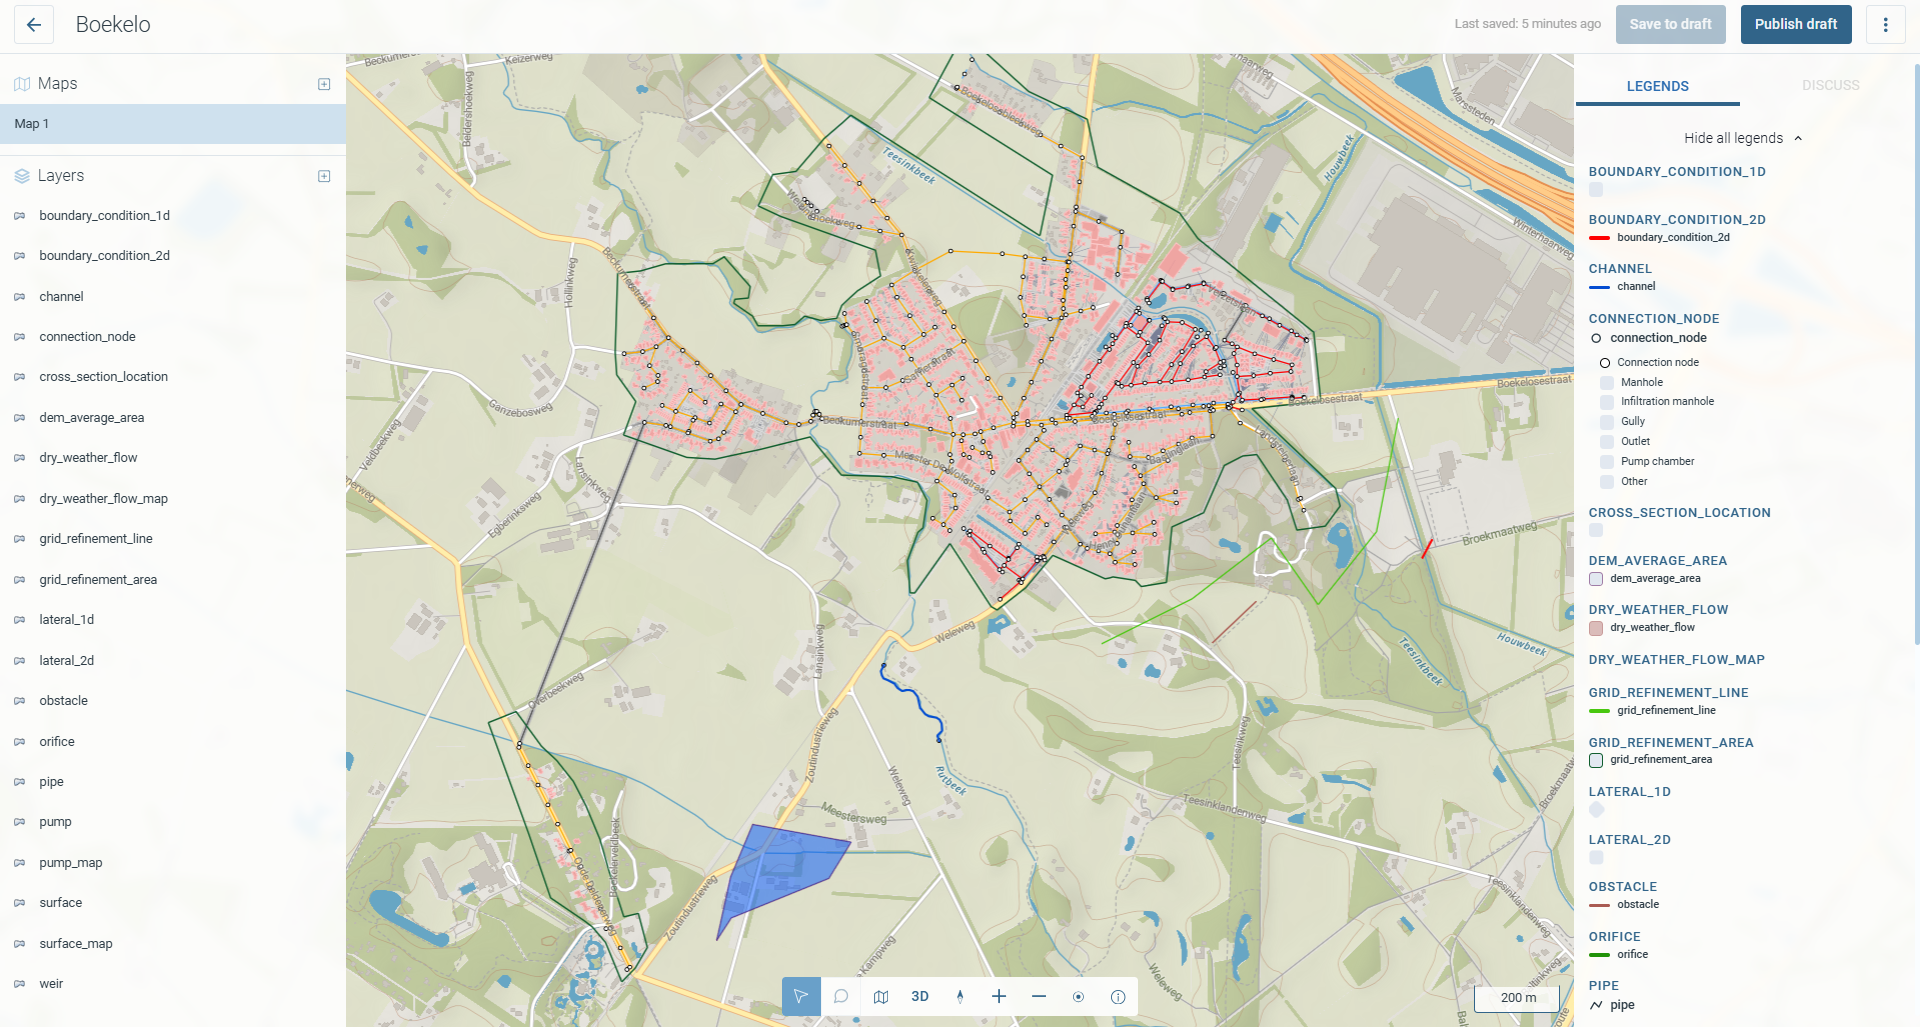
Fig. 10 The Publication Viewer showing a flood depth layer on a topographic base map. The left panel lists maps and layers; the right panel shows legends and a discussion tab.
The viewer consists of three main areas:
Left panel — Maps and Layers
The Maps section lists all maps included in the publication. Use the + button to add a new map or the ellipsis menu (
⋮) to manage maps (e.g. rename or remove).The Layers section lists all layers available in the selected map. Use the + button to add layers from the files attached to the publication. By hovering over the layer an eye and ellipsis menu appear, allowing you to toggle visibility and manage the layer (e.g. remove or move up or down).
Click a layer to select it and filter the legend panel on the right to that layer.
Hold Ctrl to select multiple layers, or Shift to select a range.
Centre — Map canvas
The main area displays the interactive map.
Use the toolbar at the bottom to switch between selection, measurement, and 3D view, or to zoom in and out.
The scale indicator in the bottom-right corner shows the current map scale.
Right panel — Legends and Discuss
The Legends tab shows the colour legend for the visible layers. Click a layer in the left panel to filter the legend to that layer.
The Discuss tab opens the commenting interface, where reviewers can leave map-pinned comments (see Comments in publications). The discuss section will only show comments belonging to currently selected map.
The title of the publication is shown in the top-left. Use the back arrow (←) to return to the overview of the data.
Versioning in publications
One of the key features of publications in Rana is version control. When you add files from your project to a publication, those files do not update automatically when the project continues to evolve. Instead, you choose exactly which version of each file to include.
This ensures that all stakeholders are looking at the same, consistent snapshot of the data, even if the project continues to change behind the scenes.
Why this matters:
It avoids confusion from unexpected updates.
Stakeholders can confidently refer to a stable version when reviewing or giving feedback.
You maintain full control over what is shared — and when.
If you want to update a publication to reflect newer data, add the updated file via + Add files and then click Publish draft again.
Styling files in publications using the Rana Desktop Client
All files in Rana have a default styling that is applied when you add them to a publication. However, you can also apply custom stylings to files in your publication to better communicate insights. For example, you can apply a specific colour scheme to a flood depth raster to highlight critical areas, or use custom symbols for point data to differentiate between various types of infrastructure.
Custom styling of publications is done using the Rana Desktop Client.
Note
It is important to realize the difference between styling a file in Rana and styling a file in a publication.
Styling the file will change the default style of that file in your Rana project. This is described in Styling files in Rana. When you add a file to a publication, the default style of that file in Rana is applied. If you change the default style of the file in Rana later, the style in the publication will not change automatically. This ensures that all stakeholders are always looking at the same, consistent styling in the publication, even if the default styling in Rana changes behind the scenes.
In this paragraph we describe how to apply a custom styling to a file in a publication. If you want to change the default styling of a file in Rana, see Styling files in Rana.
The Publications tab in the Rana Desktop Client shows an overview. If there are no publications available, create a publication first, see creating_a_publication.
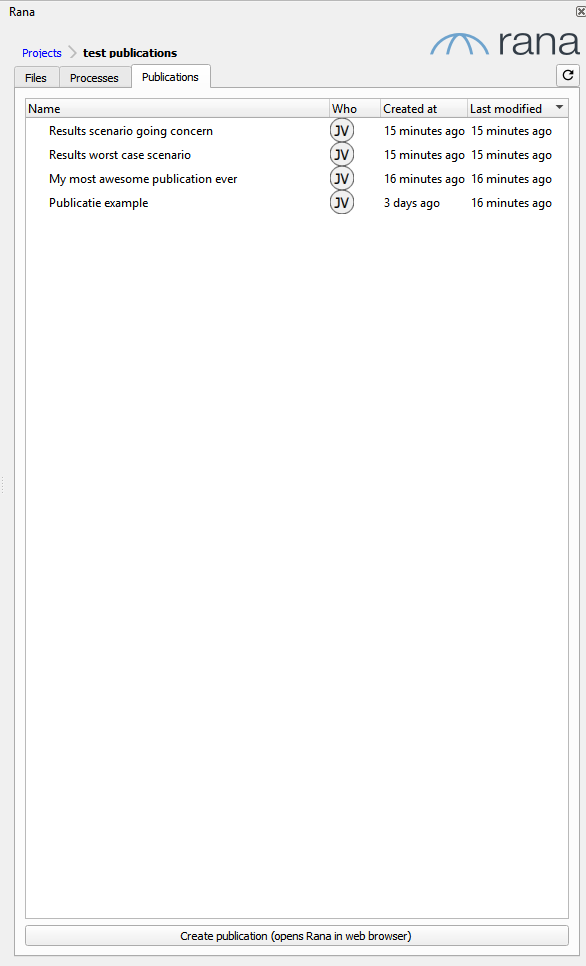
Fig. 11 Overview of publications in the Rana Desktop Client
Click on the publication you want to style files for. This will show you an overview of all files in that publication.
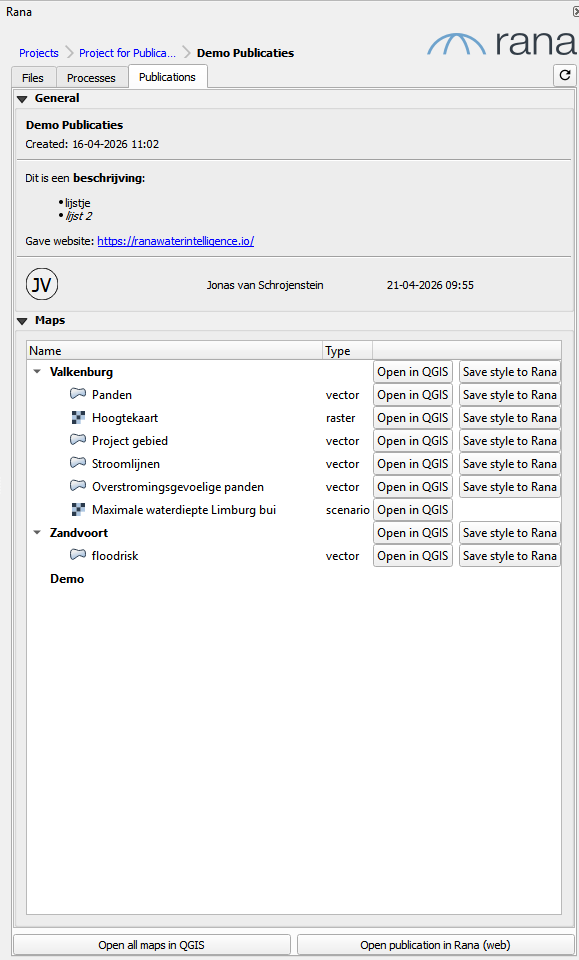
This view displays the maps and the files contained within them You have several options:
Open in QGIS for a map will download and open all the layers in that map.
Open a single file in QGIS by clicking open in QGIS next to that layer name.
Open all maps and layers for the whole publications by clicking ‘Open all maps in QGIS’
The layer menu in QGIS will reflect the same structure as is available in the publication.
Note
It is only possible to change the style of a layer in the RDC. Moving layers up and down in the layer menu will not be stored in the publication online. If you like to do that go to the Rana webplatform, open the viewer and use the ellipsis menu next to the layer name to move it up or down.
Styling of layer is done in the same was as styling any file in Rana using the RDC see Styling files in Rana. After you have applied the styling you like (‘save style to Rana’). Check the publication in the Rana Web Platform to see if your styling works.
Styling a Rana schematisation in a publication
Rana schematisations are a special type of file in Rana that represent simplified, schematic versions of hydrological models. They are designed to communicate the structure and key components of a model without overwhelming detail.
You cannot add a schematisation directly. Instead, go to the schematisation in the file tab of the Rana plugin. Double click the schematisation. On the bottom there is a button ‘export to geopackage’. Clicking this button creates a GeoPackage in your Rana project with the same name as the schematisation and a (rev #) at the end. This geopackage contains a vector layer with the same name as the schematisation. This layer has (almost) the same style as the default style of Rana schematisations in the Rana Schematisation Editor. And can be added to the publication using the Rana Web Platform.
Styling a scenario result in a publication
Rana scenarios are a special type. By default a WMS containing the maximum water depth layer is added to your publication. It is quick, but has the disadvantage that it cannot be styled. That’s why there is no button save style to Rana available for this layer. If you like to have a custom styling, use the process ‘Generate max water depth raster’ in the Rana Web Platform. The resulting file has a water depth styling and can be customized styled in the Rana Desktop Client.
Limitations to the Rana desktop client when using publications
The Rana Desktop client always looks at the data as configured in the viewer in the Rana Web Platform. This means that files that are just added to a publication, but not added to a map will not be visible in the Rana Panel in the RDC
Order of layers in a publication cannot be changed
Deleting or renaming publication, maps, files in a publication is not possible
For all of these limitations: use the Rana Web Platform instead.
Comments in publications
The commenting feature allows users to collaborate on geospatial datasets and analysis results by leaving map-based annotations, similar to how Miro or Figma handle comments.
Instead of discussing abstract concepts, users can pin feedback directly onto specific locations on the map, enabling precise discussions on hydrological models, GIS data, and project workflows.
Open the Discuss tab in the right panel of the viewer to read and leave comments. To post a new comment, click on a location on the map while the Discuss tab is active.