Organisation Settings
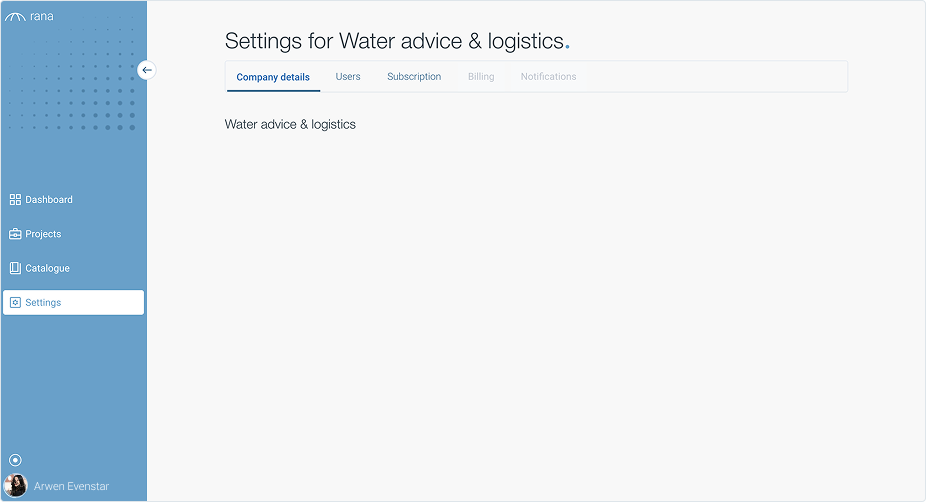
The Settings section gives you full control over your organization’s Rana environment. It includes:
Company details
View general company information.
Managing users in your organisation
Introduction
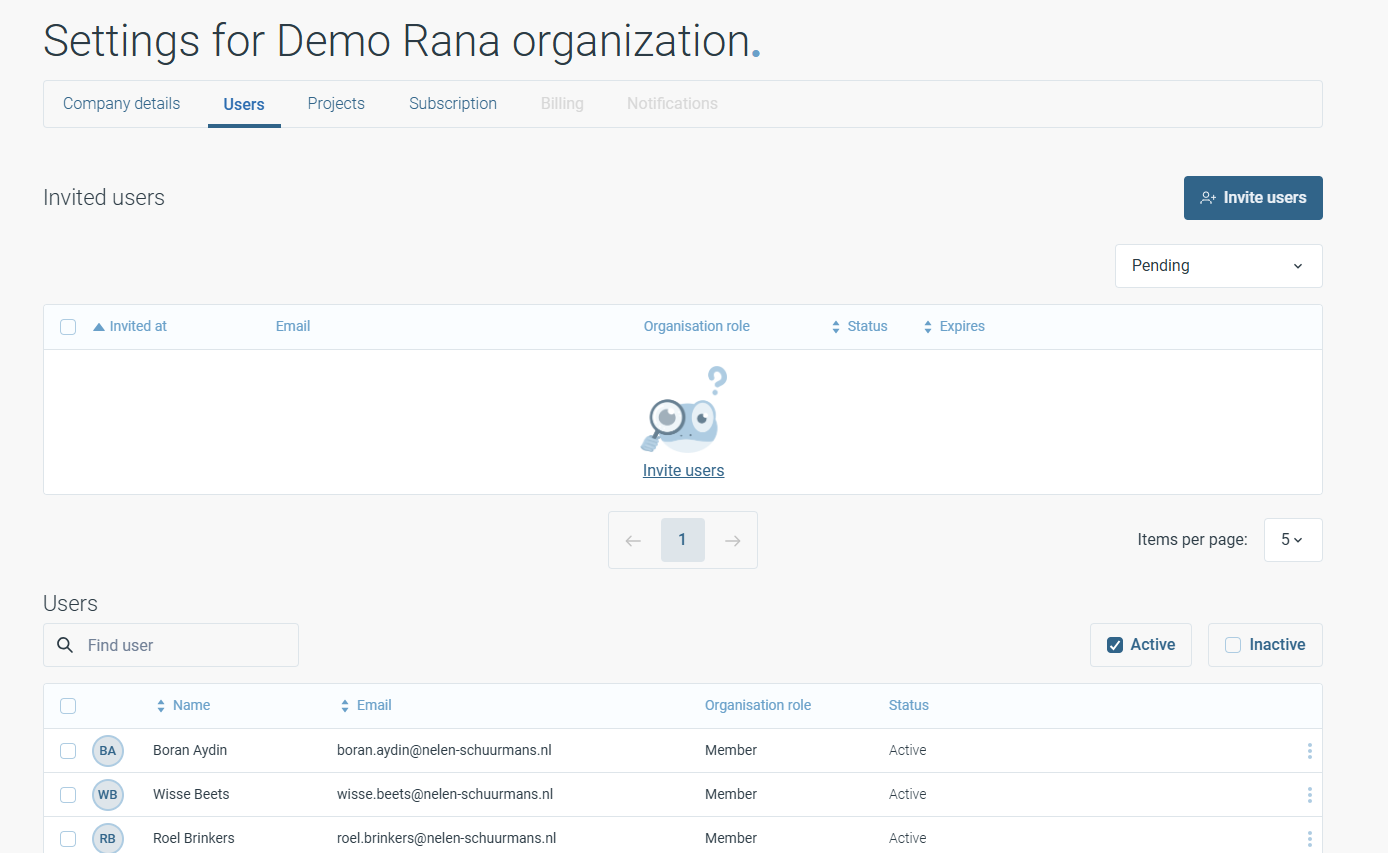
Every organisation in Rana has a Users page, where you manage who has access to the organisation and what their role is. From here you can invite new users, track pending invitations, and review or change the status of existing members.
This page is part of the organisation settings, alongside Company details, Projects, Subscription, Billing, and Notifications.
Preparation
Before you get started:
Make sure you have a Rana account with sufficient rights to manage users for your organisation. Please contact the Service desk if you need help with this.
Navigate to Settings for your organisation, then open the Users tab.
Inviting users
Follow these steps to invite a new user to your organisation:
Click Invite users in the top right corner of the Users page.
Fill in the email address (and any other requested details) for the person you want to invite.
Confirm the invitation.
The invited user will now appear in the Invited users table, with a status of Pending, until they accept the invitation or it expires.
Note
If there are no pending invitations, the Invited users table shows a placeholder message with an Invite users link, which you can use as a shortcut to start a new invitation.
Reviewing pending invitations
The Invited users table lists everyone who has been invited but has not yet joined the organisation. For each invitation, you can see:
Invited at – the date the invitation was sent
Email – the email address the invitation was sent to
Organisation role – the role the user will receive once they accept
Status – the current status of the invitation (for example Pending)
Expires – the date the invitation expires
Use the Pending dropdown above the table to filter invitations by status.
Use the checkboxes on the left of each row to select one or more invitations, for example to resend or revoke them.
Use the pagination controls below the table, and the Items per page dropdown, to browse longer lists of invitations.
Managing existing users
The Users section below the invitations table lists everyone who is already a member of the organisation.
Use the Find user search field to look up a specific person by name or email.
Use the Active and Inactive filters in the top right to switch between currently active members and users who have been deactivated.
For each user, the table shows their Name, Email, Organisation role, and Status.
Click the menu icon (three dots) at the end of a user’s row to see further actions available for that user, such as changing their role or deactivating their account.
Note
Organisation roles determine what a user is allowed to do within the organisation. Make sure to assign roles carefully, for example only granting administrative roles to users who need to manage other users or organisation settings.
Setting a folder template for your projects
Introduction
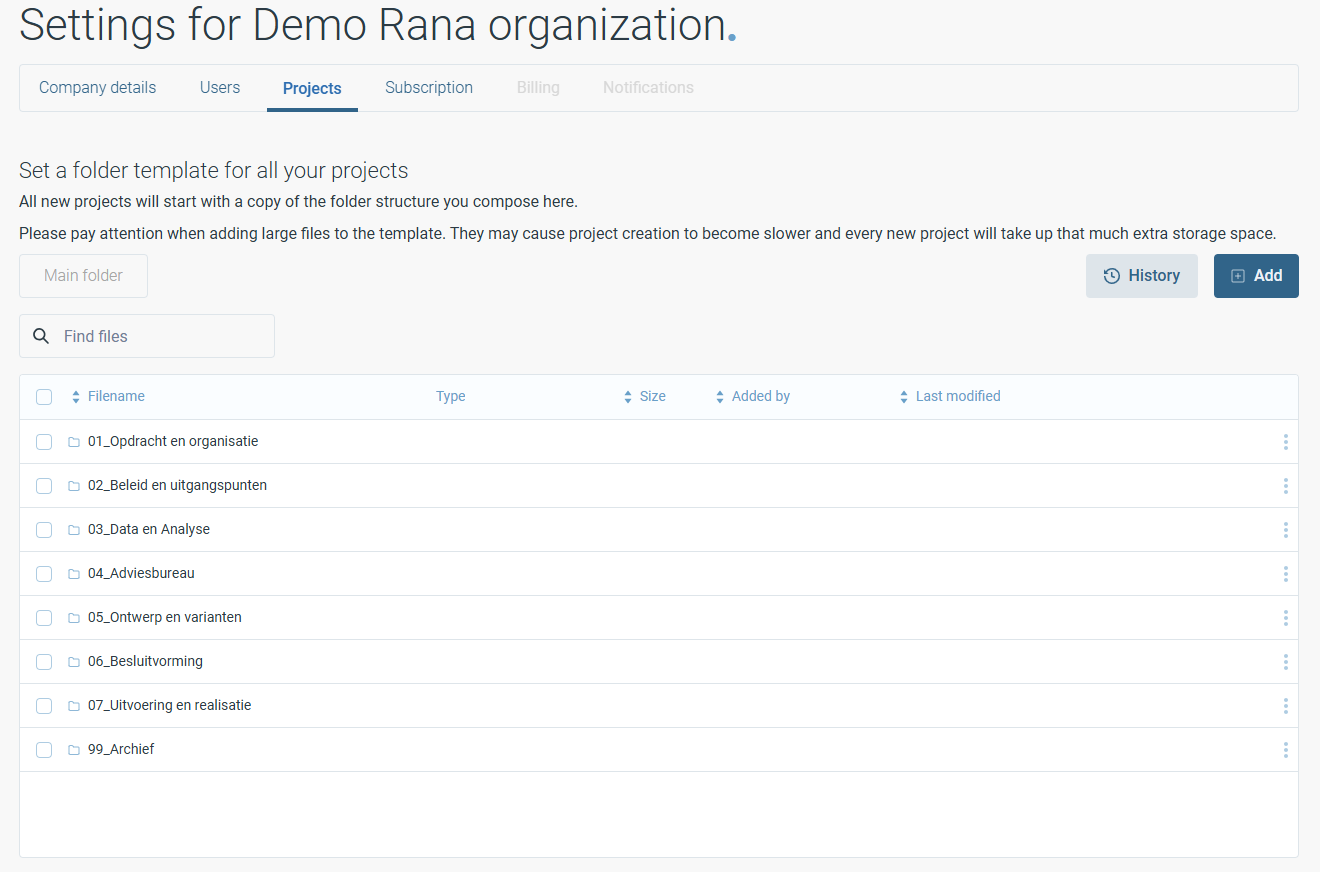
Every organisation in Rana can define a folder template, on the Projects tab of the organisation settings. Every new project you create afterwards starts with a copy of the folder structure you compose here, so you don’t have to recreate the same folders every time.
This page is part of the organisation settings, alongside Company details, Users, Subscription, Billing, and Notifications.
Note
Please pay attention when adding large files to the template. They may cause project creation to become slower, and every new project will take up that much extra storage space.
Preparation
Before you get started:
Make sure you have a Rana account with sufficient rights to manage organisation settings. Please contact the Service desk if you need help with this.
Navigate to Settings for your organisation, then open the Projects tab.
Composing the folder template
Follow these steps to build up the folder template:
Click Add in the top right corner to add a new folder or file to the template.
Give the new folder a name, for example following a numbered structure such as 01_Opdracht en organisatie, 02_Beleid en uitgangspunten, and so on.
Repeat the previous two steps to add further folders, until the template contains the structure you want every new project to start with.
Use the checkboxes on the left of each row to select one or more items, for example to remove them again from the template.
Click the menu icon (three dots) at the end of a folder’s row to see further actions available for that folder or file.
All folders and files are listed in the Main folder of the template, together with their Type, Size, Added by, and Last modified columns.
Finding files in the template
Use the Find files search field to look up a specific folder or file by name.
Use the column headers (Filename, Type, Size, Added by, Last modified) to sort the template contents.
Reviewing the template history
Click History in the top right corner to see an overview of previous changes made to the folder template.
Note
Changes you make to the folder template only apply to projects created afterwards. Existing projects keep the folder structure they were created with.
Subscription
Review and update your current plan and usage.
Billing
View invoices, payment history, and manage billing details.
Notifications
Set up how and when you receive alerts or updates.